 My brother's birthday was a week ago, and he asked me to make him a cake. It was such a nice sunny day, really not a cake-baking day, and I had already gone to pick raspberries with my daughter that morning, but since I only have one brother, I gave in and made it. So here's the recipe.
By the way, many Russian cakes have funny names that have nothing to do with what's actually in the cake. For instance, here in America we have cake names like Carrot Cake, which tells you that you're bound to have carrots in the cake. Or Cheesecake...clearly you're going to taste cheese. Russian cakes, however, have names like "Mishka na Severe" (Bear in the North) and "Ptich'ye Moloko" (Bird's Milk), just to name a few. Sometimes I wonder how these names came about... There are normal cake names, too, and this is one of them, called "Medovik" (Honey Cake).
Seven Layer Honey-Walnut Cake (Medovik)
 Cake Layers
3 tbsp. unsalted butter, melted
2 eggs
1 c. sugar
1 c. sugar
2 tbsp. honey
1 tbsp. baking soda
3 cups flour
1. Preheat oven to 325 degrees. Prepare baking sheets by spraying with non-stick cooking spray. Prepare a steam bath by bringing a medium pot half filled with water to a slow simmer. Prepare work surface by cleaning an area for rolling out the dough. In the middle of your work surface pour out 1 cup of the flour and spread it out in an even plateau (can you use that word in a recipe?) You will need to have this ready for the hot batter.
2. In a metal mixing bowl combine butter, eggs, sugar, and honey. Set bowl over the simmering water and stir ingredients until heated.
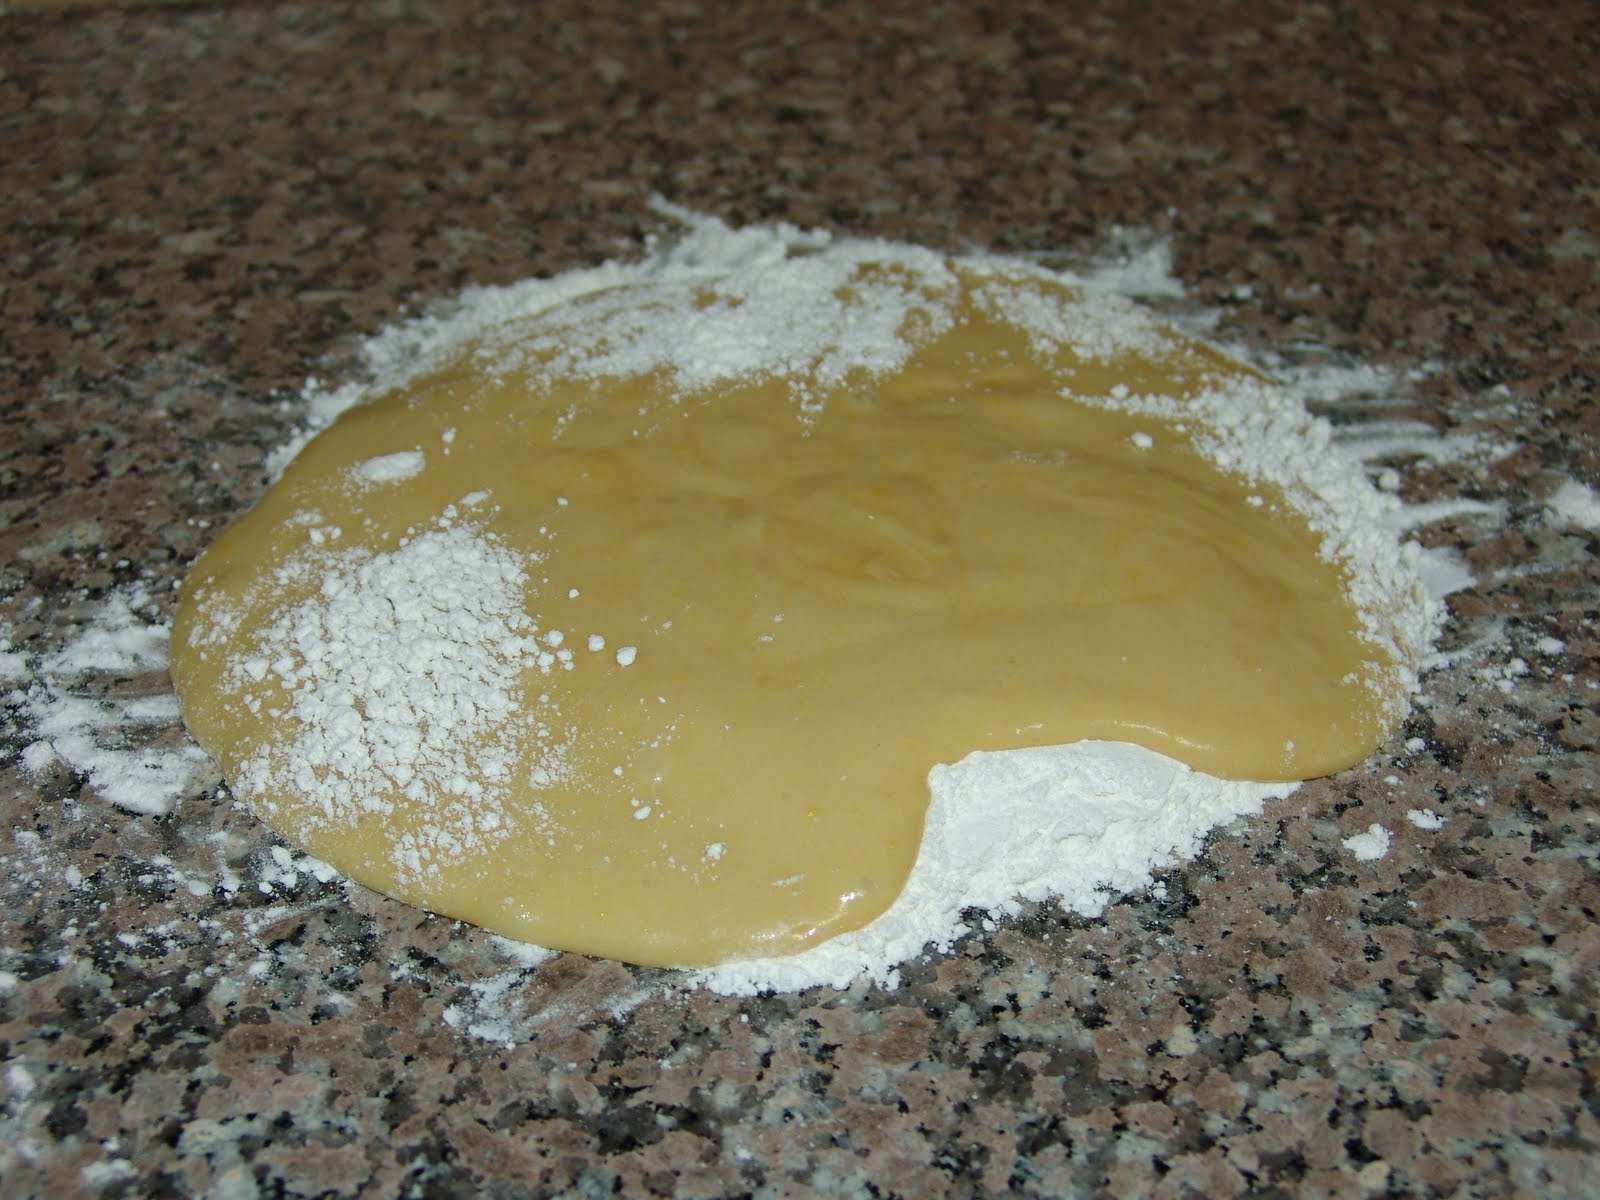
3. In a small mixing bowl, combine 2 cups of flour and the baking soda. With a wooden spoon, stir flour into the batter on the steam bath. Continue stirring until batter is smooth and heated through. Pour out the batter onto prepared flour and gently knead the flour into the batter. The batter will be hot so be careful.
3. In a small mixing bowl, combine 2 cups of flour and the baking soda. With a wooden spoon, stir flour into the batter on the steam bath. Continue stirring until batter is smooth and heated through. Pour out the batter onto prepared flour and gently knead the flour into the batter. The batter will be hot so be careful.
4. Shape dough into a loaf and divide into 7 equal parts. Shape into small balls and cover with mixing bowl (upside down) to keep warm.
5. Flour your work surface well. With a rolling pin, gently roll out each dough ball into a thin sheet. You will need to keep the sheet well floured on the top and bottom to keep from sticking to the rolling pin and your work surface. The dough will be very delicate and can easily tear. Use a plate or the bottom of a springform pan as a template for your cake layers, but do not cut the sheet into the shape until baked. Just make sure it will be big enough to make the layer size you want.
6. Gently pick up the dough sheet and place onto prepared baking sheet. Bake for 4-5 minutes, until golden. (While one sheet is baking, you can start rolling out the next one so that you have one ready to pop in the oven once the first one bakes. I always work with 2 baking sheets, and in the 5 minutes that one is baking, I roll out the next dough ball and wash and spray the previously used baking sheet.
7. Once the sheet is baked, place your template on top and cut around with a knife. Place the round layer on a flat surface to cool. Reserve the edges in another bowl. You will need them.
7. Once the sheet is baked, place your template on top and cut around with a knife. Place the round layer on a flat surface to cool. Reserve the edges in another bowl. You will need them.
(I tried putting each picture next to the step it corresponds with, but it all got jumbled up when I posted the blog...very irritating...so here are the pictures in order.)


Cake Icing (Variation #1)
2 cups heavy cream1
14 oz. can cooked condensed milk**
Beat heavy cream with electric mixer until thickened. Add condensed milk and beat until combined.
**To cook condensed milk, boil unopened can in a pot of water for 2 1/2 to 3 hours.
Cake Icing (Variation #2)
10 oz. Cool Whip
1 14 oz. can condensed milk (uncooked)
Beat Cool Whip and condensed milk until combined.
Assembling the cake
1 cup toasted walnuts
half the remaining layer edges
1. In a food processor separately process the walnuts into small chunks and the layer edges until they resemble small crumbs.
2. Spread icing on the first layer, sprinkle walnuts on top, then cover with next layer. Continue icing and sprinkling walnuts every layer, except the final one. Ice the sides of the cake.
3. Shape your cake crumbs into a small mound. Carefully pick up the cake with both hands and roll it through the mound so that the crumbs stick to the iced sides.
4. Place the cake onto a serving platter, ice the top, and sprinkle with cake crumbs and walnuts. Let rest in the refrigerator for about an hour until the layers absorb the icing. Serve and enjoy!


Oh yeah, and if you have left over icing and cake edges, eat them!

Oh wow I'm in your blog! Thank you! I still have your plate from the cake!
ReplyDelete