Saturday, July 31, 2010

When Green Looks Good

Yesterday morning I woke up with a grand plan to cook something I haven't made in a long time: Shavleviy Borscht (Sorrel Borcht). Unfortunately, my husband had let his brother borrow his car and so he had to take mine to work. I was stuck at home trying to figure out what I could do with whatever I had in the fridge. I ended up making chicken broth, figuring that I could run to the grocery store as soon as I got my car back and finish making the borscht. That didn't happen until late evening as we decided to take advantage of the beautiful weather and drove down to Alki for a stroll. The stroll didn't happen either. My daughter insisted on playing in the sand, which was fine. My husband and I lounged on the beach, watched the waves, and let our daughter practice sharing her toys with some new friends. With our busy schedules (well, not mine, as I'm on summer break) we rarely get to get out like this so it was a treat. I still wanted to make my borscht so as soon as we got home I drove to Safeway and bought my ingredients and made a delicious pot of it. And now I don't have to cook anything at all today because there is a big pot of borscht sitting in my fridge right now!

Now, this borscht is usually made with sorrel leaves, which taste sour, but since I can't access the sorrel my mother has in her garden because she moved all the way to Missouri, I use spinach and lemon juice as substitutes and it still tastes pretty darn good. I've never seen sorrel in a grocery store, so if any of you ever find one that sells it, do let me know.

Very Easy Chicken Broth

2 carrots, roughly chopped into large chucks
1 onion, roughly chopped
4 sticks celery, roughly chopped
2 chicken drumsticks
2 bay leaves
1 tsp. ground pepper
2 tsp. kosher salt
3 quarts water

1. Combine ingredients in a large stock pot. Bring to a slow simmer on medium-high heat (don't let it boil). Then, reduce heat to medium low, and let slowly cook for 30 minutes.
2. Using tongs, remove the drumsticks. Let cool slightly, then remove the meat from the bone and shred with fingers or a fork. Reserve for later use in soup or borcht.
3. Strain the broth through a sieve. Discard cooked vegetables. This will make about 2 1/2 quarts of broth. Refrigerate until needed.
I didn't have celery at home so I went ahead and made the broth without it and it turned out just fine. I just like to use celery because it gives it a richer flavor.


Green Spinach Borscht

2 1/2 quarts Chicken Broth (see recipe above)
cooked chicken, shredded (use reserved meat)
1 tbsp. olive oil
1/2 onion, chopped small
3 potatoes, peeled and chopped into small chunks
5 oz. spinach, stemmed and chopped
4 eggs
2 tbsp. chopped fresh parsley
2 tbsp. chopped fresh dill
2 tbsp. lemon juice, from half lemon
1 tsp. kosher salt
1 tsp. ground pepper


1. In a medium saute pan, heat 1 tbsp. olive oil. Add chopped onion and saute until onions are carmelized. Set aside.

2. Heat broth at medium high heat until steamy, but not simmering. Add potatoes, reduce heat to medium and cook until tender.

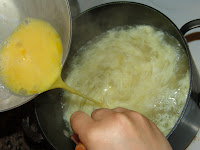
3. While the potatoes are cooking, whisk the eggs in a medium bowl. When potatoes are tender, holding the egg bowl in one hand, slowly pour in the eggs, while stirring the broth with your other hand. The eggs will have a feathery texture.

4. Add the spinach, carmelized onions, chicken, parsely, dill, lemon juice, salt, and pepper. Stir. Let cook for another 10 minutes until all flavors blend. Serve hot with a dollop of sour cream and a nice chunk of rustic bread.


Variation: Instead of pouring the eggs raw into the broth, you can also boil them separately, then chop the hard boiled eggs into small chunks and add them last. Tastes just as good, but gives a different texture. That is how my mom makes this borscht. My husband likes the delicate feathery texture of the eggs so I cook it like that to make him happy.

Monday, July 26, 2010

Piece of Cake

The weather has been amazing lately and I've been staying away from the kitchen and enjoying it! In retrospect, it isn't very good for the pocketbook because we've been eating out a little too often. However, I took a trip to Costco and bought a bunch of meat so I'm ready to go back into the kitchen in full swing...

My brother's birthday was a week ago, and he asked me to make him a cake. It was such a nice sunny day, really not a cake-baking day, and I had already gone to pick raspberries with my daughter that morning, but since I only have one brother, I gave in and made it. So here's the recipe.

By the way, many Russian cakes have funny names that have nothing to do with what's actually in the cake. For instance, here in America we have cake names like Carrot Cake, which tells you that you're bound to have carrots in the cake. Or Cheesecake...clearly you're going to taste cheese. Russian cakes, however, have names like "Mishka na Severe" (Bear in the North) and "Ptich'ye Moloko" (Bird's Milk), just to name a few. Sometimes I wonder how these names came about... There are normal cake names, too, and this is one of them, called "Medovik" (Honey Cake).

Seven Layer Honey-Walnut Cake (Medovik)

Cake Layers
3 tbsp. unsalted butter, melted
2 eggs
1 c. sugar
2 tbsp. honey
1 tbsp. baking soda
3 cups flour


1. Preheat oven to 325 degrees. Prepare baking sheets by spraying with non-stick cooking spray. Prepare a steam bath by bringing a medium pot half filled with water to a slow simmer. Prepare work surface by cleaning an area for rolling out the dough. In the middle of your work surface pour out 1 cup of the flour and spread it out in an even plateau (can you use that word in a recipe?) You will need to have this ready for the hot batter.

2. In a metal mixing bowl combine butter, eggs, sugar, and honey. Set bowl over the simmering water and stir ingredients until heated.

3. In a small mixing bowl, combine 2 cups of flour and the baking soda. With a wooden spoon, stir flour into the batter on the steam bath. Continue stirring until batter is smooth and heated through. Pour out the batter onto prepared flour and gently knead the flour into the batter. The batter will be hot so be careful.

4. Shape dough into a loaf and divide into 7 equal parts. Shape into small balls and cover with mixing bowl (upside down) to keep warm.

5. Flour your work surface well. With a rolling pin, gently roll out each dough ball into a thin sheet. You will need to keep the sheet well floured on the top and bottom to keep from sticking to the rolling pin and your work surface. The dough will be very delicate and can easily tear. Use a plate or the bottom of a springform pan as a template for your cake layers, but do not cut the sheet into the shape until baked. Just make sure it will be big enough to make the layer size you want.

6. Gently pick up the dough sheet and place onto prepared baking sheet. Bake for 4-5 minutes, until golden. (While one sheet is baking, you can start rolling out the next one so that you have one ready to pop in the oven once the first one bakes. I always work with 2 baking sheets, and in the 5 minutes that one is baking, I roll out the next dough ball and wash and spray the previously used baking sheet.

7. Once the sheet is baked, place your template on top and cut around with a knife. Place the round layer on a flat surface to cool. Reserve the edges in another bowl. You will need them.
8. Repeat for the remaining 6 dough balls until you have 7 equally round layers.


(I tried putting each picture next to the step it corresponds with, but it all got jumbled up when I posted the blog...very irritating...so here are the pictures in order.)


Cake Icing (Variation #1)
2 cups heavy cream1
14 oz. can cooked condensed milk**

Beat heavy cream with electric mixer until thickened. Add condensed milk and beat until combined.
**To cook condensed milk, boil unopened can in a pot of water for 2 1/2 to 3 hours.

Cake Icing (Variation #2)
10 oz. Cool Whip
1 14 oz. can condensed milk (uncooked)

Beat Cool Whip and condensed milk until combined.


Assembling the cake
1 cup toasted walnuts
half the remaining layer edges

1. In a food processor separately process the walnuts into small chunks and the layer edges until they resemble small crumbs.

2. Spread icing on the first layer, sprinkle walnuts on top, then cover with next layer. Continue icing and sprinkling walnuts every layer, except the final one. Ice the sides of the cake.

3. Shape your cake crumbs into a small mound. Carefully pick up the cake with both hands and roll it through the mound so that the crumbs stick to the iced sides.

4. Place the cake onto a serving platter, ice the top, and sprinkle with cake crumbs and walnuts. Let rest in the refrigerator for about an hour until the layers absorb the icing. Serve and enjoy!


Oh yeah, and if you have left over icing and cake edges, eat them!

Wednesday, July 14, 2010

Play Date Canapes

Earlier today a few of my girlfriends came over with their kids for a play date. It's still hard to believe that we all have kids. It seems that only yesterday we were single and care-free, hanging out at Alki, chillin' at Starbucks, playing soccer at Celebration Park, or having lunch after church at the Burien Azteca. Now we're kissing away owies, changing diapers, laughing about the funny things toddlers say, and sharing what we put on the table for our men and kids. Play dates are a great time to share stories over a few simple dishes, like canapes (small open-faced sandwiches) and this morning I prepared a trio of these for my friends.

You have to start out with a yummy spread. As I've been cooking Russian food in the past few weeks I've noticed that quite a few recipes call for mayonnaise--must be a Russian staple. Here's something I came up with on my own that I like to use as a spread.


Garlic-Herb Mayo

1/2 head of garlic cloves, minced
1/4 cup dill, finely chopped
1/4 cup parsley, finely chopped
2 cups mayonnaise

Mix all ingredients together.


Easy, right? Yep. I was inspired by the herb-butter I learned to make in my Culinary Arts class at the Art Institute of Seattle--yep, yep, I did go to Culinary School--for an entire FOUR DAYS!!! It was a month long class held on Saturdays. I got into it simply on accident when I filled out a scholarship application and BSed about how I was going to apply my new knowledge of culinary arts in my ENGLISH class. Surprisingly I got that scholarship and got to spend some time in a professional kitchen with a French chef. I have to say that if I ever decide to change careers, culinary arts will be it. It was an amazing experience! It is where I also learned the term "canape," speaking of which, I have digressed...

For the canape recipes, I will not be writing the actual number of things you need because it all depends on how many you want to make. So if you want to make a lot of canapes, you're gonna need a lot of sliced bread, cucumbers, tomatoes, etc. If you're only gonna make one (which is rather silly), you'll need much less. Anyway, common sense.
Starting with the hardest one...

Eggplant-Tomato Canapes

baguette, sliced
Garlic-Herb Mayo
fried eggplant slices (read on for how to fry)
tomato, sliced
mozzarella or Gruyere cheese, shredded
chopped dill (optional)

Assembling the canape: Spread the bread with Garlic-Herb Mayo, top with a slice of fried eggplant, then with a slice of tomato. Garnish with shredded cheese and dill.

To fry eggplant:
1. Slice the eggplant, toss with some salt, and place in colander over a mixing bowl for at least an hour. This way the eggplant will release some if its bitter juices.

2. Heat some oil in a skillet (you will need to keep your jug of oil nearby as the eggplant takes in a lot of it as it fries) and place eggplant slices in hot oil. Don't forget to pat the eggplant slices with a paper towel to dry out moisture prior to frying otherwise when the moisture hits the oil you and your stove will be covered with a ton of oil sprays...

3. Fry eggplant until golden brown on each side. You will probably need to keep adding oil to your skillet as you keep frying.

4. After all eggplant slices have been fried, place back in colander over a mixing bowl and let it sit for a few hours as the excess oil drips out of the fried eggplant. You can even stick this whole contraption in the fridge overnight and let the oil trickle down into the mixing bowl. Eggplant is now ready to use!

***This is how much oil seeped out after 4 hours...


Smoked Salmon Canapes
baguette, sliced
Garlic-Herb Mayo
cucumber, sliced
smoked salmon slices
mozzarella or Gruyere cheese, shredded
chopped dill (optional)

Assembling the canape: Spread the bread with Garlic-Herb Mayo, top with a slice of cucumber, then with a slice of smoked salmon. Garnish with shredded cheese and dill.


Sprat Canapes

baguette, sliced
Garlic-Herb Mayo
cucumber, sliced
can of smoked sprats in oil, halved
mozzarella or Gruyere cheese, shredded
chopped dill (optional)

Assembling the canape: Spread the bread with Garlic-Herb Mayo, top with a slice of cucumber, then with half a sprat. Garnish with shredded cheese and dill.

Tuesday, July 13, 2010

Spice Rack Make-Over

This has nothing to do with Russian food, but I'm pretty excited about my "new" spice rack so I thought I'd share. I got my spice rack as a wedding gift five years ago and in these five years it mostly sat quietly in the corner collecting dust since none of the spices that it came with are of any use. I've never come across a recipe that calls for savory or marjoram. And the fish, steak, and poultry seasonings look rather suspicious. I'm actually curious how many of you who own spice racks actually use the spices they come with... Anyhow, this week I decided that I'm going to chuck it and make room for something else. Lucky for the spice rack, I came across a pretty nifty label maker on my trip to Costco today and a brilliant idea occurred: What if I just chuck the spices I don't use, relabel the jars, and fill them with spices I do use... And that is exactly what I did. This is why I'm still up at midnight because I've been cleaning, drying, labeling, and refilling the spice jars all evening. Here are the results:

BEFORE / DURING / AFTER


Very exciting, isn't it? Although, now that I think about it, I haven't really used any spices other than salt and pepper in any of the Russian food recipes I've made so far... Time to experiment!

Monday, July 12, 2010

Sweltering Away

This past week we finally got some sunshine in Western Washington and I had a hard time making myself stand by a hot stove and cook, but I did, and I don't think I'm ever going to do it again. Thursday was the worst. I spent the entire evening in the kitchen in 90 degree heat, regretting that I embarked on this cooking adventure. In the end I situated myself on a lawn chair, with a plate full of yummy food, stretched out my legs, and ordered my husband to bring me a glass of cold kvass. Just kidding, I asked nicely, but I did at that point wish I had a house-elf like Harry Potter (btw--I'm on the last book!).

Other than occasionally enjoying the sunshine and roasting myself in the kitchen, I made a quite few phone calls to my mom to ask about recipes. That really made her week, because I absolutely hate talking on the phone and rarely call. Texting, I love, but talking on the phone is like facing a stack of freshmen essays. I blame my parents who made me make phone calls for them all the time because they didn't speak English and I did. In fact, I hate interpreting just as much, which is really inconvenient since I'm trying to decipher the only Russian cook book that I own, and I have to say that it's not really fun. I mean, look at this. The entire recipe is one paragraph and the instructions are so vague I had to guess at every step, and it's not even step-by-step! My mom has an interesting way of going about cooking, too, which doesn't help. I was trying to make some cookies and I asked her how long they need to be in the oven. Her response: "What do you mean how many minutes? I don't look at the minutes. I just look at the cookies. If they look done I take them out." Hmmm. Although the cookies came out pretty good, I'll have to test them again before posting that recipe...

Anyway, this week, I finally busted out the meat grinder my parents gave me for Christmas, ground up some pork and made some pretty tasty kotleti (my mom doesn't trust the ground meat at the grocery store and doesn't think I should either). And I know they were good because my husband said, "I can't stop eating these!" Always a good sign because if he doesn't like something too much he asks for some ketchup or sriracha...


Pork Cutlets (Kotleti)
makes about 30

2 lbs. ground pork
1 cup milk
4 slices white bread
1/2 onion, minced
5 garlic cloves, minced
2 eggs
2 tsp. black pepper
2 1/2 tsp. kosher salt
vegetable oil

1. Soak the bread in the milk for 10 minutes.

2. Combine ground pork, soaked bread, onion, garlic, eggs, salt, and pepper using your hands.

3. Fill frying up with about 1/4 inch of oil (about 3/4 cup) and heat.

4. Shape meat mixture into small patties and place in hot oil. Cook for about 5-6 minutes on each side, or until dark brown. Serve with mashed potatoes, buckwheat, or pasta. Or just eat them with some yummy Russian black bread.


And here's a really simple dessert that was perfect for these hot days when I wanted something sweet, but didn't want to make an effort to bake anything.

Waffles
2 14 oz. cans condensed milk
1 stick unsalted butter, melted
1 package of waffle sheets (these come in a package of 10 and you can find them at any Russian store)
1. Place unopened cans of condensed milk in stock pot. Add enough water to completely submerge the cans and boil for 3 hours. (You need to watch these though and keep adding water was it evaporates. I've heard stories of exploding cans.... ) Cool condensed milk before using. You can prepare these a day ahead, too.

2. Spoon condensed milk into a mixing bowl. Add melted butter. Stir until all combined and carmely-looking.
3. Divide waffle sheets into two sets of 5 (to make 2 waffle cakes). Generously spread first 4 layers of each cake with condensed milk mixture, layering each sheet on top of the next.

4. Waffle cakes need to absorb the condensed milk so it is best to weigh them down with something heavy (I like to use a teapot full of water). Let them sit like that for at least an hour. Then cut into cubes or rhombuses (rhombi?) and enjoy!

Friday, July 2, 2010

American Tastebuds

I've been thinking about American foods that I couldn't stomach when I first moved here. For the longest time I could not eat Mac & Cheese. What was this powdered orange stuff? Cheese? Really? It wasn't until I had my daughter that I finally gave it another shot and it's still not my fave, but it's easy and kids seem to love it so now I buy it in bulk at Costco and it lasts about a year. I remember school lunch. Oh my. Sloppy Joes? Ick. That mess oozing out. How could anyone eat that? And what about celery and peanut butter? Still can't eat that. Green stick with a brown glob on top. Really? I don't mean to knock on American food, but I think many of us are probably hesitant about trying out new things, fearing a volcano might erupt if we take a single bite. So I was a little nervous yesterday while cooking up a few Russian dishes for a playdate at my place with some of my American friends and their kids. While it was a great chance to test my Russian food on American tastebuds, my brain was in "I hope they like this" mode. I shouldn't have worried. I mean, take a look at this picture:


Oh and I do have to add, that while I spent all morning trying to get my dishes just right, when it came to cooking up some of that good ol' American Mac & Cheese for the kids, I completely failed. Dumped the entire contents of the box (inluding the cheese package) straight into the boiling water. Epic. Shows how often I make it...

Below are the recipes of last night's winners. I brewed some kvass, but I didn't use rye bread and raisins like real kvass recipes call for, instead I made a "cheater" version that's much faster and tastes pretty good. Maybe when we actually have some sunshine and I get my hands on some really good rye bread, I'll try and make a real kvass. Oh, and kvass is gonna hit a ton of American tastebuds pretty soon thanks to Coca-Cola. For dessert, I made blinchiki, which are basically cheese filled crepes. This morning I heated the leftovers in some butter on a frying pan and it made for an extremely delicious, if not exactly healthy, breakfast.

Cheater Kvass


1 can frozen apple juice
3 tbsp. instant coffee
1 cup sugar
1 tbsp. yeast
water

  1. Combine apple juice, coffee, and sugar in a 6 quart stock pot. Add water to fill almost to the top. Bring to a boil. Reduce heat to medium and let simmer for about 15 minutes.

  2. Cool until barely warm. Sprinkle yeast over the top of the liquid, cover, and let stand at room temperature for at least 8 hours. Refrigerate. (For a stronger buzz, brew longer at room temperature).


Blinchiki with Blueberry Sauce

For the crepes
makes approximately 25 crepes

5 eggs
3 cups milk
2 tbsp. vegetable oil
1 1/4 cups sifted flour


  1. Whisk all ingredients together. Let batter rest for 30 minutes before using.
  2. Brush a non-stick skillet with some vegetable oil and heat it before starting to make crepes.
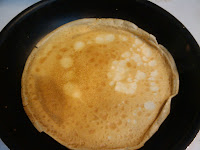
  3. 3. When the skillet is hot, pour about half a ladle of batter into the skillet and twirl it so the batter spreads evenly in a thin layer. Cook about 30 seconds, then loosen the edges with a rubber spatula. Gently flip it with your fingers and cook on the other side for another 30 seconds. (If the first one doesn't come out right, it's okay. My first one always ends up in the trash. Try again.)

For the filling

10 oz. cream cheese, softened

7 oz. condensed milk (1/2 can)

In a mixing bowl, combine cream cheese and condensed milk using spoon or fork. It doesn't need to be perfectly smooth, since it'll be inside the crepe anyway.


Assembling the crepes

1 stick unsalted butter

1. Generously butter bottom and sides of a 9 x 13 inch baking dish. Melt half of the remaining butter in the microwave and set aside. Stick the rest of the butter in the refrigerator (it's easier to slice when it's cold).


2. Cut the crepes in half.


  1. 3. To make a blinchik, spread the cheese filling on the half-crepe, fold in thirds, and then in thirds again (see pictures...this is hard to explain). Place seam side down in the baking dish.


4. Once you have a layer of blinchiki, brush them generously with the melted butter. Then slice half the cold butter (from the fridge) and scatter on top of the layer. Repeat with another layer on top until you use up all the crepes and filling. The butter keeps the crepes from sticking to each other.


5. Cover the blinchiki with foil and bake in a 350 degree oven for 30 minutes. (For make ahead, you can cover with foil and stick them in the fridge until you're ready to use them. I usually make them a day ahead and then all I have to do when the guests arrive is stick them in the oven right before dessert time).


For the Blueberry Sauce

2 cups blueberries
3 tbsp. sugar
juice from 1/2 lemon

Combine ingredients in a small sauce pan and heat until blueberries start to break down and get liquidy. Pour over blinchiki.